


Windows XP Remote Desktop
Windows XP Professional allows you to connect to other Windows machines remotely using the XP Remote Desktop feature. Essential for anyone who needs to access their desktop while at home, the office or on the road.
Prerequisites:
Windows XP Professional
DynIP Basic service or higher
How-To:
Part 1 - Setting Up XP Remote Desktop
We must first enable the XP Remote Desktop before we can begin using it.
- Click the Start Menu, select the Control Panel and double click the System icon.
- Choose the Remote Tab and select Allow users to connect remotely to this computer.
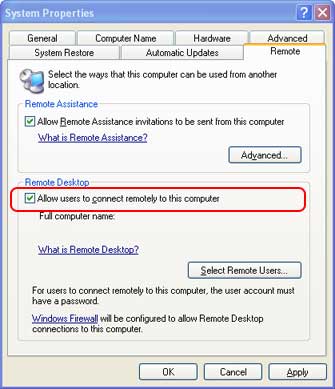
- Ensure that the account you are currently logged in as has a password set. If the account does not have a password you will need to set one or create a new user that has a password. If you create a new user, allow this users to access this computer remotely by click Select Remote Users and add the newly created user.
- Click Ok to save your settings.
- Leave your computer running or lock the workstation.
Part 2 - Connecting to your XP Remote Desktop
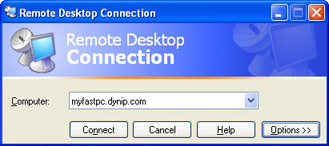
Once you have successfully enabled your remote desktop you can now try to login from a remote location.
- Click the Start Menu, select All Programs, Accessories, Communication and click Remote Desktop Connection.
- Enter your DynIP internet name in the "Computer" drop down menu and click Connect.
-
After clicking connect you will be presented with a login dialog from Windows XP. Enter the username and password for the remote user and click Ok.
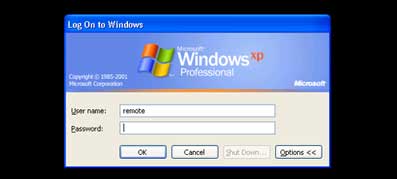
- You are now connected to your remote desktop.